G DMZ Setup Configuration: A Comprehensive Guide to Secure Your Network
In today's digital age, network security is more crucial than ever. One effective way to protect your network is by implementing a demilitarized zone (DMZ) setup configuration. A DMZ is a network segment that separates public-facing services from your internal network, acting as a buffer zone between the two. In this article, we'll delve into the world of G DMZ setup configuration, exploring its benefits, requirements, and step-by-step setup process.
What is a DMZ?
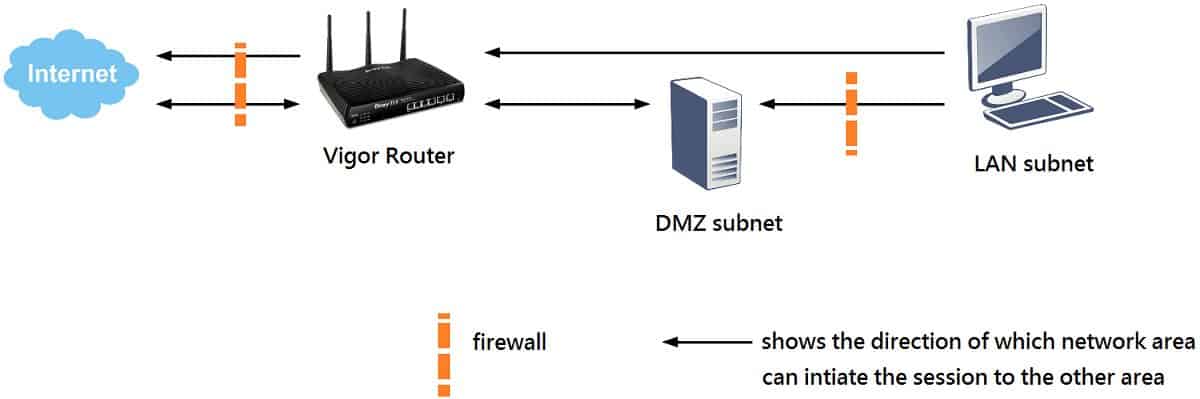
A DMZ is a network security concept that creates a neutral zone between your internal network and the external internet. It's a sub-network that's behind the firewall but open to the public. By placing your public services on a DMZ, you add an additional layer of security to your LAN (Local Area Network). A DMZ setup configuration is essential for organizations and individuals who want to protect their sensitive data and maintain a robust network security posture.
Benefits of a DMZ Setup Configuration
Improved network security: A DMZ setup configuration separates public-facing services from your internal network, reducing the risk of unauthorized access and potential breaches.
Enhanced compliance: By implementing a DMZ setup configuration, you can demonstrate your commitment to network security and compliance with industry regulations.
Reduced risk of cyber attacks: A DMZ setup configuration acts as a buffer zone between your internal network and the external internet, reducing the risk of cyber attacks and data breaches.
Easy management: A DMZ setup configuration allows for easy management of public services, making it simpler to update and maintain your network infrastructure.
Requirements for a DMZ Setup Configuration
A router or firewall: A DMZ setup configuration requires a router or firewall that supports DMZ functionality.
A DMZ host: A DMZ host is a device that operates outside of your firewall, allowing remote access from the internet. Examples of DMZ hosts include web servers, mail servers, and digital video recorders (DVRs).
IP address reservation: To setup a DMZ host, you need to reserve an IP address for the client device. This can be done using the G54 Web Manager or from the client device's network settings.
Step-by-Step G DMZ Setup Configuration
Access theNetworking > DMZpage on your router or firewall to configure a Demilitarized Zone (DMZ) setup.
Identify your DMZ host and reserve an IP address for the client device.
Setup port forwarding on your router or firewall to allow incoming traffic to your DMZ host.
Configure your firewall rules to allow traffic to your DMZ host while blocking traffic to your internal network.
Test your DMZ setup configuration to ensure it's working correctly.
Best Practices for a DMZ Setup Configuration
Always use secure protocols: Use secure protocols such as HTTPS and SFTP to transfer data to and from your DMZ host.
Regularly update your firewall rules: Regularly update your firewall rules to ensure they're effective and secure.
Monitor your network activity: Monitor your network activity to detect any potential security threats or breaches.
Conclusion
A DMZ setup configuration is a critical component of network security that separates public-facing services from your internal network. By following the step-by-step guide and best practices outlined in this article, you can implement a robust G DMZ setup configuration that protects your network from potential security threats. Remember to always prioritize security and stay up-to-date with the latest network security trends and best practices.

 - GFI Support")


 Ethernet Interface ... - nixCraft")

