Setup Netgear Router As Access Point: A Step-by-Step Guide
Having a reliable and stable internet connection is essential in today's digital age. One way to achieve this is by setting up your Netgear router as an access point (AP). This mode allows your router to extend the wireless coverage of your existing network, providing a stronger and more consistent signal. In this article, we will take you through the step-by-step process of setting up your Netgear router as an access point.
Why Set Up Your Netgear Router As Access Point?
Setting up your Netgear router as an access point offers several benefits, including:
- Extended wireless coverage: By setting up your Netgear router as an access point, you can extend the wireless coverage of your network, providing a stronger and more consistent signal throughout your home or office.
- Improved network performance: Access point mode allows you to create a dedicated network for your IoT devices, laptops, and other devices that require a strong and stable connection.
- Enhanced security: By setting up your Netgear router as an access point, you can create a separate network for guests, protecting your main network from unauthorized access.
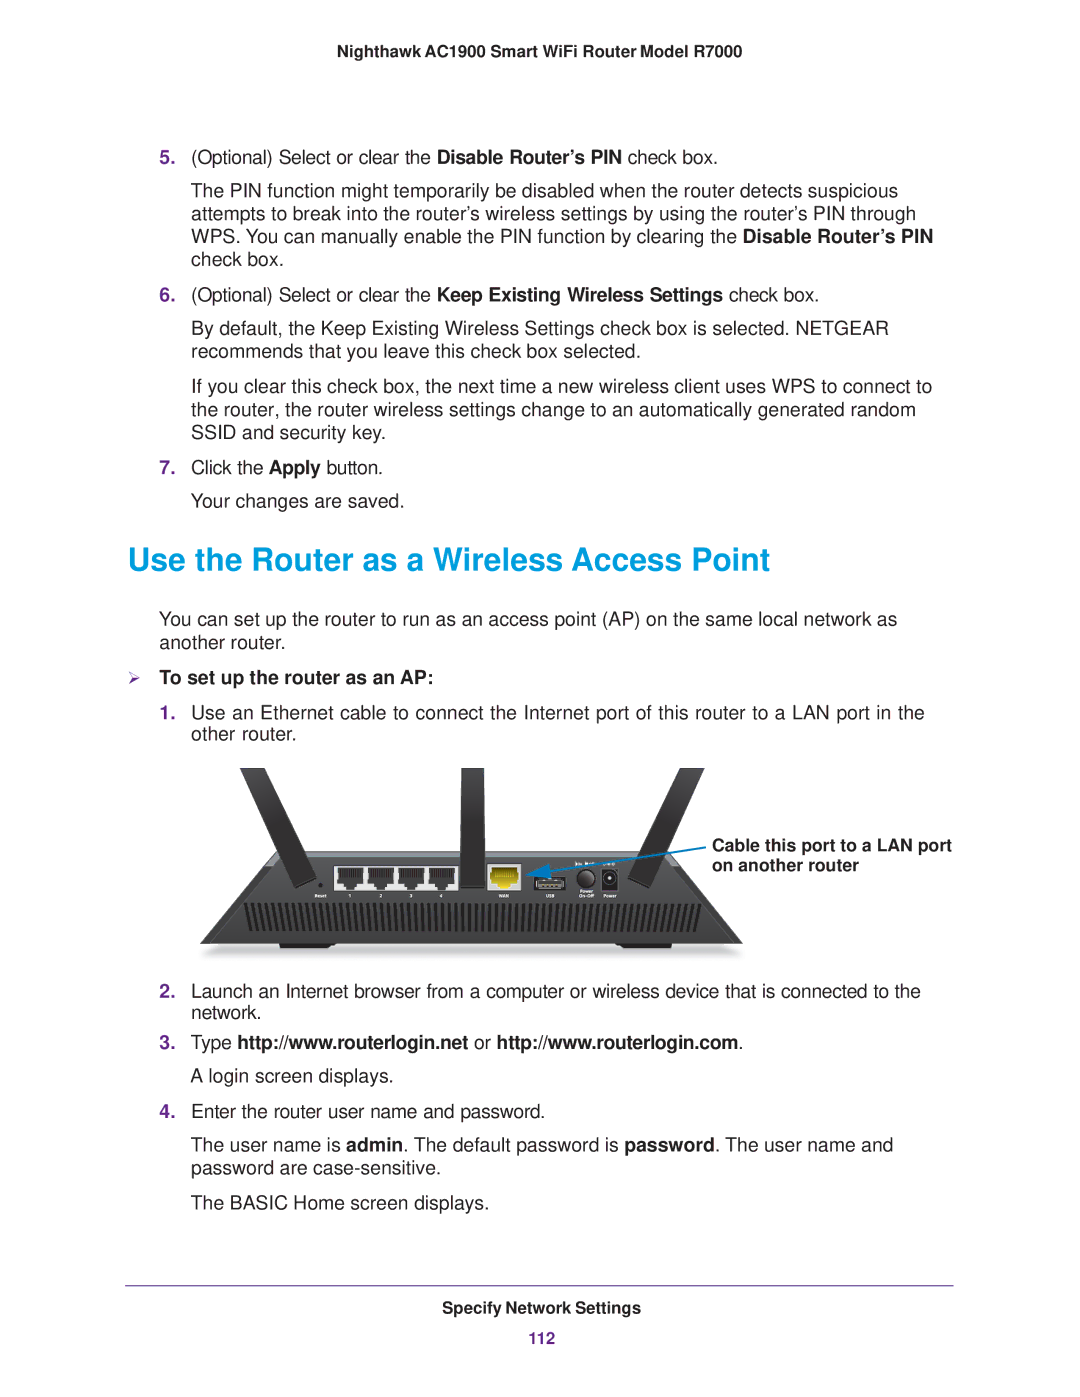
Step 1: Connect Your Computer to the Netgear Router
Before you can set up your Netgear router as an access point, you need to connect your computer to the router using an Ethernet cable. Make sure you connect your computer to one of the LAN ports on the router, not the WAN port.
Step 2: Access the Netgear Router Menu
Once you have connected your computer to the Netgear router, open a web browser and type in the address bar `www.routerlogin.com`. This will take you to the Netgear router menu. Log in to the router using the default username and password.
Step 3: Change the Operation Mode
Once you are logged in to the Netgear router menu, click on the `Operation Mode` or `Network Mode` section. Select `Access Point Mode` from the drop-down menu.
Step 4: Configure the Wireless Network
Once you have selected the access point mode, scroll down to the `Wireless Network` section and configure the following settings:
- Wireless Network Name (SSID): Give your network a name that is easy to remember and recognize.
- Wireless Channel: Select the wireless channel that is least crowded and provides the strongest signal.
- Security Settings: Choose the security settings that best suit your needs, including WPA2 encryption and a strong password.
Step 5: Connect the Netgear Router to the Main Network
Using another Ethernet cable, connect the Netgear router to one of the LAN ports on the main router. This will allow the Netgear router to extend the wireless coverage of the main network.
Step 6: Test the Network
Once you have set up your Netgear router as an access point, test the network to ensure that it is working as expected. Connect devices to the network and check that they are able to access the internet without any issues.
Conclusion
Setting up your Netgear router as an access point is a straightforward process that can provide several benefits, including extended wireless coverage, improved network performance, and enhanced security. By following the steps outlined in this article, you can set up your Netgear router as an access point and enjoy a stronger and more consistent internet connection throughout your home or office.
Common Issues and Solutions
If you encounter any issues while setting up your Netgear router as an access point, refer to the following common issues and solutions:
- Issue: The Netgear router does not appear in the list of available networks.
- Solution: Check that the Netgear router is connected to the main network and that the wireless network is enabled.
- Issue: The Netgear router is not providing a strong signal.
- Solution: Check that the Netgear router is set to the correct channel and that the wireless network is configured correctly.
- Issue: Devices are unable to connect to the network.
- Solution: Check that the network is configured correctly and that the devices are configured to connect to the correct network.

 - YouTube")


 as an Access Point")


- 3x1G Ports, Easy Setup, Security ...")
