Configuring Router for Security Cameras: A Comprehensive Guide
Installing security cameras is an excellent way to enhance your home or business security. However, to ensure seamless surveillance and remote monitoring, it's crucial to configure your router correctly. In this article, we'll provide a step-by-step guide on how to configure your router for security cameras, covering the basics of setting up a network, configuring port forwarding rules, and optimizing your router's settings for optimal performance.
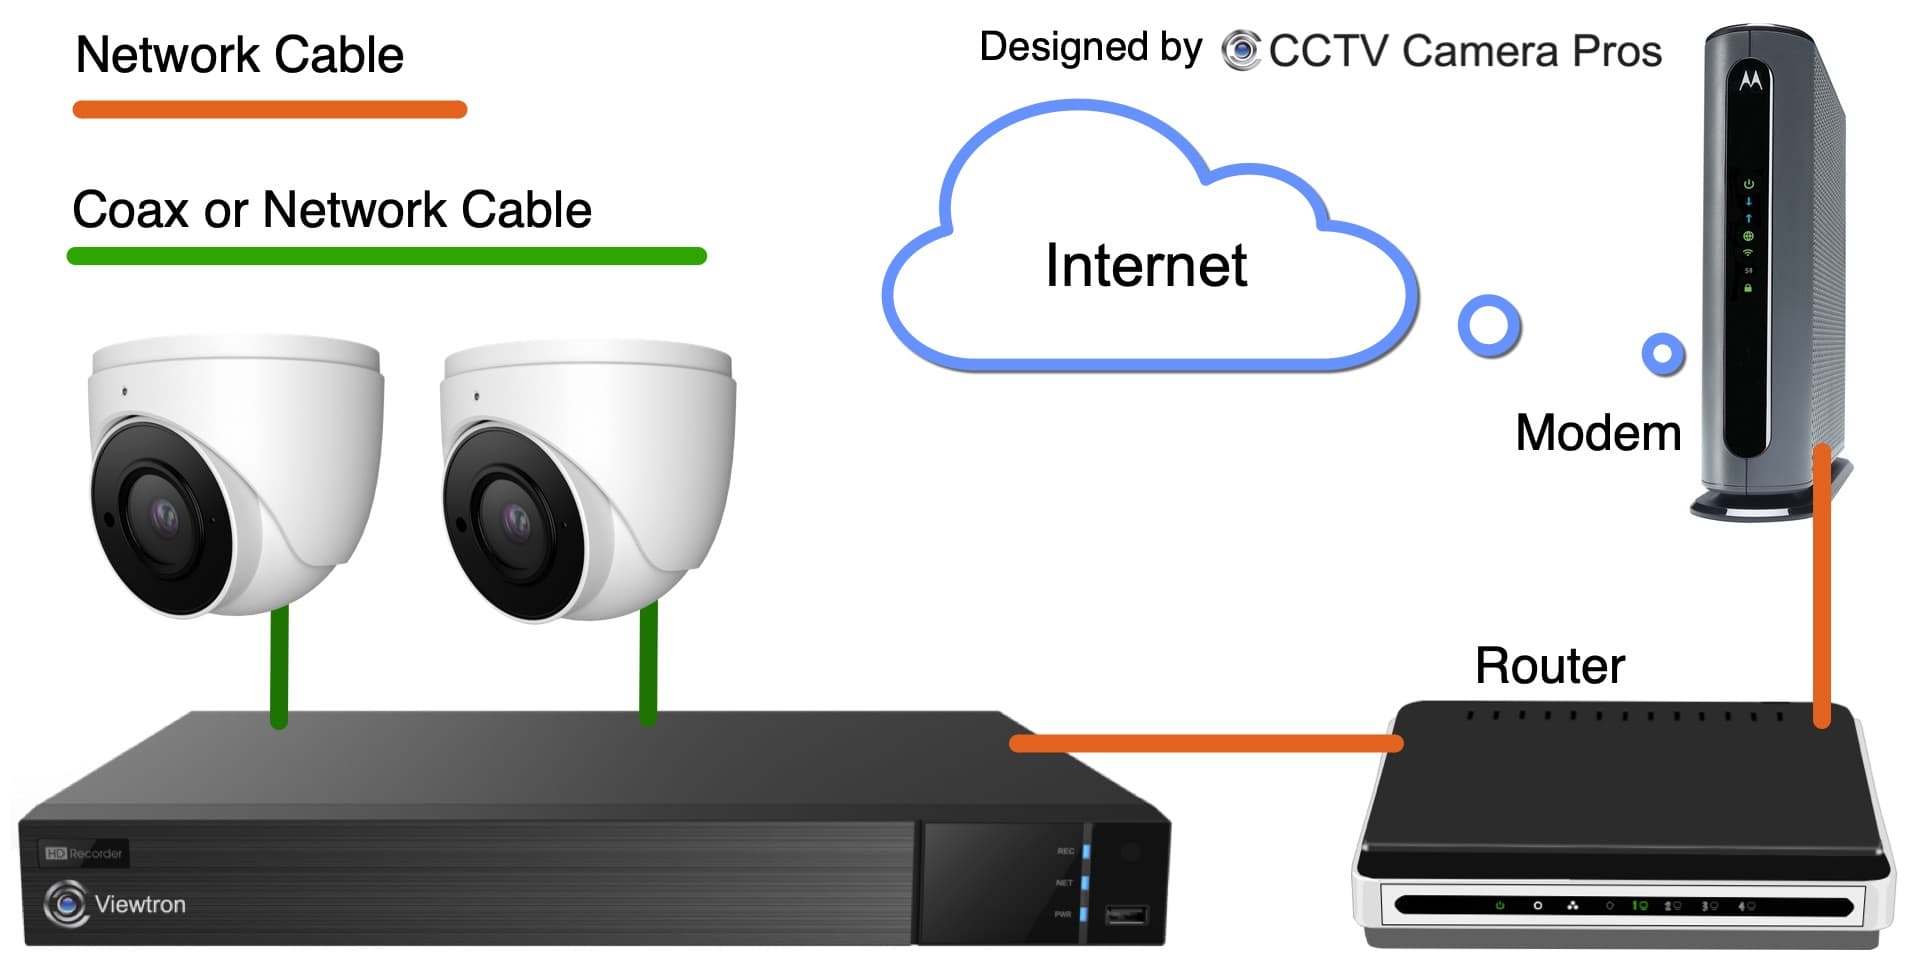
Step 1: Connect Your Security Camera to Your Local Area Network (LAN)
The first step is to connect your security camera to your local area network (LAN). You can use an Ethernet cable (also known as Cat 5 or Cat 6 cable) to connect the camera to your router, gateway, or access point. If your security camera has Wi-Fi capability, you can also connect it wirelessly to your network. However, a wired connection is more stable and secure than a wireless one.
Choosing the Right Router for Security Cameras
When selecting a router for your security cameras, consider the following key features:
- Speed: Look for a router that offers fast speeds, preferably with a Gigabit Ethernet port for wired connections.
- Coverage: Ensure the router can cover your entire area, including your security cameras.
- Security: Opt for a router with robust security features, such as WPA3 encryption and a firewall.
- Range: Choose a router with a strong signal strength to maintain a stable connection with your security cameras.
Step 2: Configure Port Forwarding Rules
Port forwarding rules are essential for remote access to your security cameras. This involves configuring your router to forward incoming requests to your camera's IP address. Here's how to set up port forwarding rules:
Step 2.1: Find Your Router's IP Address
To access your router's settings, you need to find its IP address. You can usually find this by checking your router's documentation or searching online for your router model's IP address. Common IP addresses include:
- 192.168.0.1
- 192.168.1.1
- 10.0.0.1
Step 2.2: Access Your Router's Settings
Once you have your router's IP address, open a web browser and enter the address. You'll be prompted to log in with your administrator credentials. If you don't have these credentials, check your router's documentation or reset your router to its default settings.
Step 2.3: Configure Port Forwarding Rules
Log in to your router's settings and navigate to the port forwarding section. Here, you'll need to create a new rule for each security camera. Typically, you'll need to enter the following information:
- Port number: The port number assigned to your camera (e.g., 8080)
- Protocol: The protocol used by your camera (e.g., TCP or UDP)
- IP address: The IP address of your camera
Step 3: Optimize Your Router's Settings for Optimal Performance
To ensure optimal performance from your security cameras, consider the following settings:
Step 3.1: Quality of Service (QoS) Settings
QoS settings help prioritize traffic for your security cameras, ensuring they receive the necessary bandwidth for smooth streaming. You can typically find QoS settings in your router's settings under advanced or network settings.
Step 3.2: Enable Quality of Service (QoS) for Your Security Cameras
Enable QoS for your security cameras by setting the priority level to high or above. You can also configure the QoS settings to limit the bandwidth allocated to your security cameras, preventing them from hogging all the bandwidth.
Conclusion
Configuring your router for security cameras is a crucial step in setting up a seamless surveillance system. By following these steps, you can ensure optimal performance from your security cameras, remote access, and robust security features. Remember to choose the right router for your security cameras, configure port forwarding rules, and optimize your router's settings for optimal performance.

![Best Wifi Router For Security Cameras [Updated:March 2026]](https://securitiescameras.com/wp-content/uploads/2022/08/Router-for-Security-Cameras-2-683x1024.png "Best Wifi Router For Security Cameras [Updated:March 2026]")


")


