Setup Netgear Router As Access Point For Multiple Devices: A Step-by-Step Guide
In today's connected world, having a stable and reliable network is crucial for both personal and professional purposes. A single router often may not be enough to provide the necessary coverage, especially in large homes or offices. This is where a Netgear router as an access point comes into play. In this article, we will guide you through the process of setting up a Netgear router as an access point for multiple devices.
What is a Netgear Router and How Does it Work as an Access Point?
A Netgear router is a network device that allows multiple devices to connect to the Internet wirelessly or via wiring. When you set up a Netgear router as an access point, you're essentially turning it into a dedicated Wi-Fi broadcaster that extends your existing network coverage.
- Why Choose a Netgear Router as an Access Point? - To expand your existing network coverage, improve connectivity and range, and reduce dead zones.
- Types of Networks - To set up a Netgear router as an access point, you can use either a wired or wireless connection.
- Key Features - A Netgear router as an access point offers improved network coverage, increased device connectivity, and enhanced data transfer rates.
Setup Instructions and Requirements
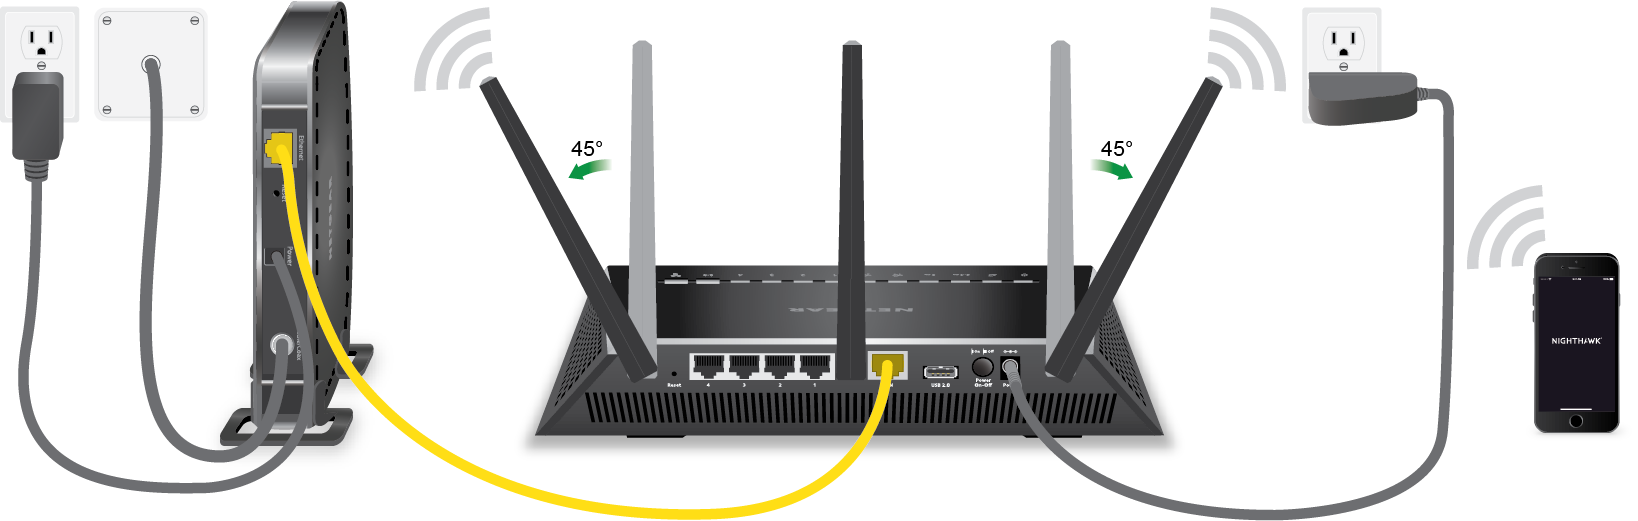
Step 1: Connect a Computer to the LAN Port of the Netgear Router
Connect a computer to one of the LAN (not WAN) Ethernet ports at the back of the Netgear router. This will give you access to the router's settings and configuration menu.
Step 2: Access the Netgear Router Menu
Open a browser and type in the address bar `www.routerlogin.com`. This will redirect you to the Netgear router menu, where you'll be able to access the settings and configure the router as an access point.
Step 3: Log in to the Netgear Router
Type in the user name `admin` and the password, which is usually printed on the bottom of the Netgear router. If you haven't changed the password, you may be prompted to create a new one.
Step 4: Select the Advanced Settings
On the Netgear router menu, select the `Advanced` or `Settings` option, depending on your router model. Here, you'll find the settings for configuring the router as an access point.
Step 5: Enable Access Point Mode
Look for the `Access Point` or `Bridge Mode` setting and enable it. This will allow the Netgear router to function as an access point and extend your existing network coverage.
Step 6: Configure the Access Point Settings
Configure the access point settings, such as the SSID (network name), channel, and security settings. Make sure to save the changes and restart the Netgear router.
Restart the Netgear Router to Apply Changes
Restart the Netgear router to apply the changes and start using it as an access point.
Setup and Testing
Once you've configured the Netgear router as an access point, test it by connecting devices to the extended network. Use a tool like Wi-Fi Analyzer to scan the available networks and ensure the access point is transmitting the signal properly.
Tips and Precautions
Before setting up a Netgear router as an access point, ensure that your existing router supports bridge mode. Failure to do so may result in network conflicts or reduced performance.
Conclusion
Setting up a Netgear router as an access point is a straightforward process that can help improve your network coverage and connectivity. By following the steps outlined in this guide, you can enjoy a more stable and reliable network experience.


 - YouTube")
 as an Access Point")


 On Amazon")
